Upload Independent 3D Model
Users can also upload an independent 3D model in the supported formats that has not been generated via the PointFuse Cloud/Desktop workflow.
These models are often utilized as comparisons to the uploaded point cloud or for QC against the PointFuse generated model.
- Select the Upload 3D Model button.
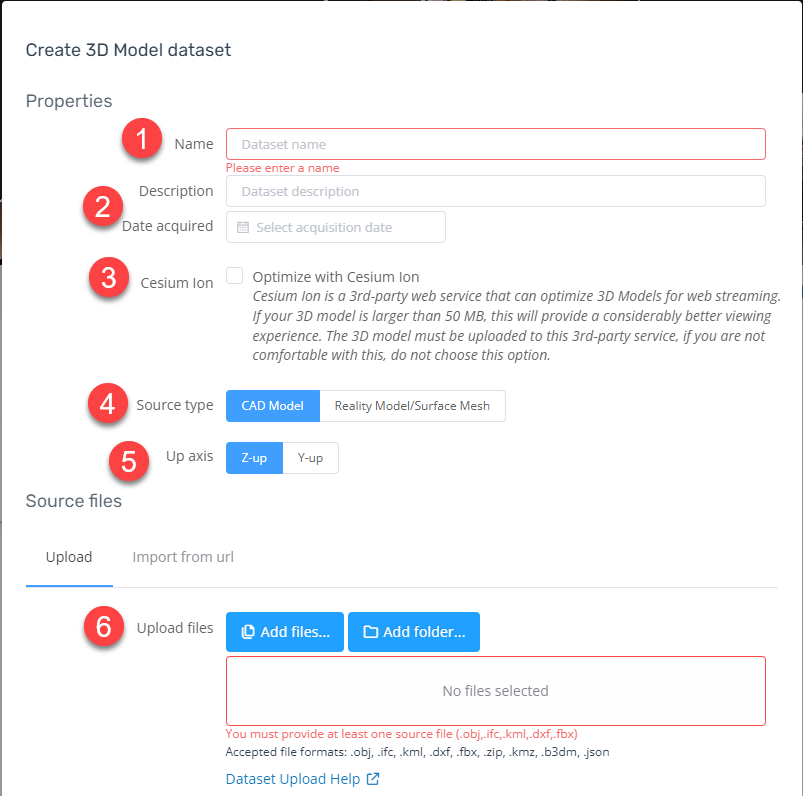
- Enter a Name.
- Enter a Description and Date acquired (optional).
- Toggle on Cesium Ion (for any models greater than 50mb - optimizes the model for web streaming). Leave off if the model format is Cesium 3D tiles.
- Source type - Select either CAD model or Reality Model/Surface Mesh. Select CAD model (by default) unless your model was generated from photogrammetric reality modeling software.
- Choose either Z-up or Y-up axis. (This depends on the software that is used to export the model)
- Source files - Add model files (ensuring they are an accepted format).
- Define the Source coordinate system:
- Select the 'same coordinate system as the point cloud' option
- Select 'let me select from a list of coordinate systems' and add the applicable coordinate system options.
- Select 'enter a proj string manually' (advanced users only).
- Select Create to upload and build the 3D model into the 3D Viewer.
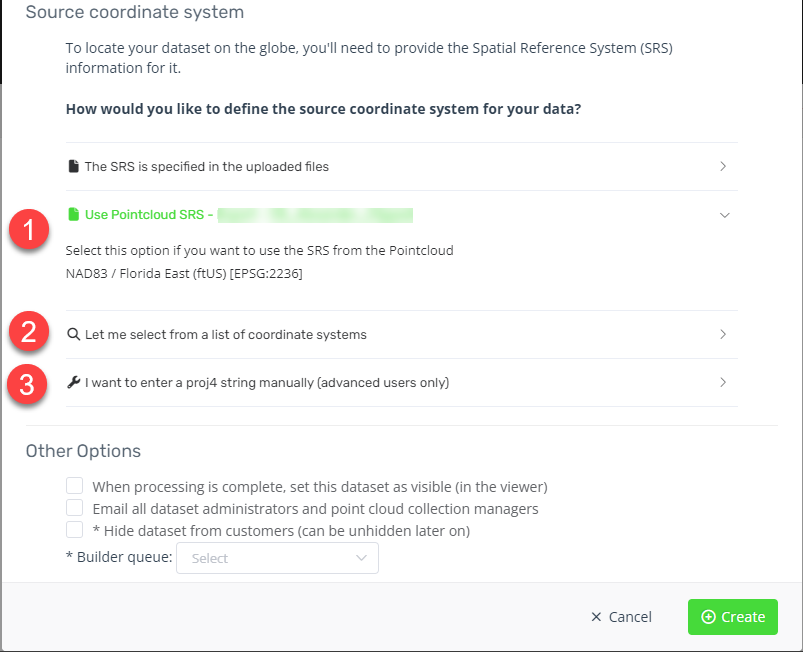
- The user will receive a confirmation email once the 3D model is available.